Showing posts with label Concept. Show all posts

Wednesday, September 15, 2010

Making a Back Flag: Concept

0 comments
Image from Belegarth.com

I have long wanted to make a back flag. You can see in the above image one such flag. I am hoping to put togather a set of "tournament" garb and the back flag is a key part of my concept. I think they look way cool. Here is my mock up:

Tuesday, February 23, 2010

Cuff Armor Prototype

0 comments

I found a intractable for fingerless gloves the other day. I really like fingerless gloves, I have pare of light leather ones I fight with all the time and love, they offer some protection against burns, still allow good grip and are stylish. But I would like to have bit more coverage and maybe some thicker protection on top. So I am thinking of using parts of this pattern to make a armored glove (Nija Brig stile). This is my first prototype, I like the feel and look of it so far.

I will probably have 3 or 4 leather plates sewn in to pockets, I might think about some thumb protection, and might add a velcro (or some other kind) fastener at the wrist.

Wednesday, February 3, 2010

Thinking on Leather Armor

0 comments


Well, I was hoping to post something more here (thus why this post is so late), but I don't think I will be able to get to anything until next weekend. To be honest, I am waffling a bit. See, a few months ago I purchased a side of leather grade armor (12-14oz) from tandy during a sale.

I had intended to try to sell peaces of it to cover the cost and the peace I would keep. But when I got it, I looked at it, I smelled it, I fell in love with it. I didn't want to sell it. I wanted to make a leather Lorica Segmentata.

So far I have printed off patterns from http://www.larp.com/legioxx/lorica.html and traced it on to my side. It takes up about 1/3rd of the side. The most non-squareed side of the side, but still a 1/3rd.

So here I sit looking at it, wanting to cut it up and make some armor, but without the hart to claim 1/3rd of the price of it as privet expense.

Saturday, February 21, 2009

Monster Helm Design

0 comments

     The other day I decided to make up a helm pattern. A realm mate of mine was wondering about helm ideas, and since he is the monster type I decided to make a mock up monster helm. I am now growing very fond of it myself, and think I might just make one for myself at some point.

    It needs some revisions ATM, the back of the helm particularly, but also the chin needs more coverage, and the forehead part needs some stream lining. I also have some ideas for the teeth.


    When I first made it I expected it to have horrible visibility on account of the teeth, but they are a non factor really, and because of the wide mouth, you have very good prifial vision.

Monday, December 22, 2008

Armor Patterns

0 comments
Ok I have been promising a post on patterns. Well here it is!

Well to start off I do a google search and check a few sites that I know of:

http://www.armourarchive.org/patterns/

http://armorgeek.com/Default.aspx

And some times these are good enough, and I am finished here. I print it off, cut it out and trace it on to my material.

However. Usually I want to make my own design. So I sue my printed out pattern as a template to start modifying.

Now paper is very playable week substance. So I often I will transfer to cardboard or something else, that wile still payable, give some rigidity to the template. Some people use craft foam.

I always try the template on to see if I like it. If I am not satisfied with the cardboard version, what are the chances that I will be happy with the steel or leather version? Slim. Thats what.

If you will be attaching peaces together (with rivets say) you should always test with your templates first. Even if all you have is tape.

Thursday, November 20, 2008

Armor Stand

0 comments
I have often wanted a stand for my garb and armor to be displayed on, rather then just hiden away in my closet.

Now what I would really like is a quality mannequin, but, those are pricey beyond belief, and I can build an armor stand. Now, don't get to exited, I probably wont for a wile yet still, but I came across a good design for one today I though I would share.


Thursday, November 6, 2008

Armor concept design

0 comments
     I was inspired by a guy in the Dag boards, named Lizerd King, armor. It was a leather brig mantel. It reminded me of Egyptian mantel armor. It got me thinking, and I liked it. It was good shoulder and upper torso protection, could have good mobility and would be made cheeper, possibly with scraps. The more I thought of it, the more I liked it.

     Anyway, I got carried away. And ended up designing an armor concept, that I may try some day in the future when I get the money for leather.


     I think the "plates" of leather on the mantel would be thinner (width not thick) to give better movement, and maybe sectioned in to 3 from neck hole to edge rather than 2.

What do you think of it? Is it good? Bad?

Friday, October 10, 2008

The Rope Maker

0 comments

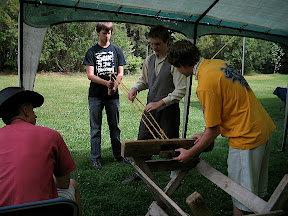
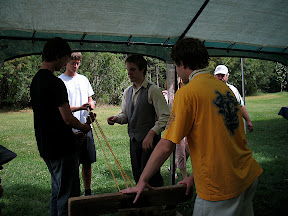
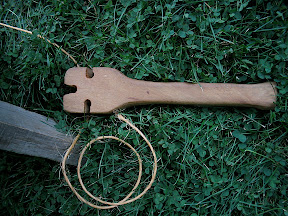
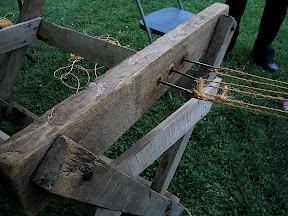
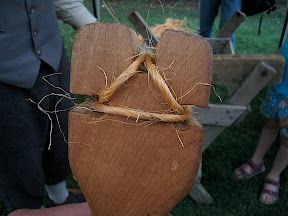
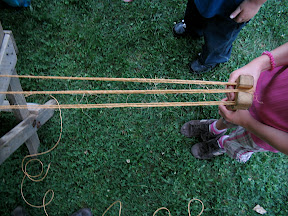
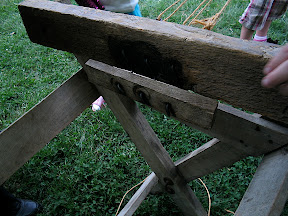
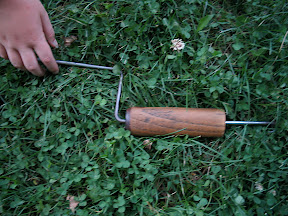
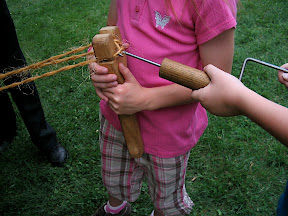
The other-day I was at an alberta history place, and there was a guy making rope. I was very intrigued, and after spending a bit of time at the both, I decided I want to make my own rope making contraption! IT is pretty simple, and I took picts of everything, here they are:


The tools are not to complicated. Hopefully a tutorial on how to make one of these and how to make rope with it will soon be on the way in the coming months!

Wednesday, August 27, 2008

Small Pavilion Tent: Step 1 - Getting started

0 comments
Ok, I am finaly just going to up and do it. I am making a pavilion tent. The test vertion befor I make the "good one" and reck it and waste all kinds of money on canvas!


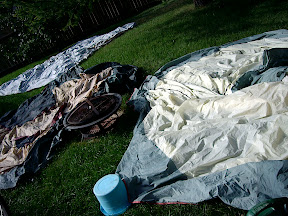
The first thing I did was to collect a few tents, one my parents where going to throw out, and another from a giveaway take away. Cost 0$


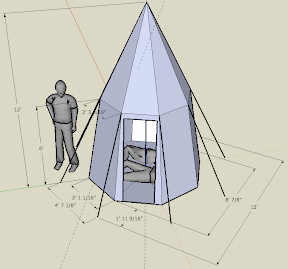
Their are several way to hold up a pavilion tent, the main two are by ropes, and the other by a "spoke" design (almost like a wagon wheel). I didn't like the spokes simply because of the amount of space they would take up for travel. So I designed a small tent that used only ropes and one center pole.


As you can see however, the guy wires take up a LOT of extra room, even with my design indented to minimize the extra rope footprint! And the peek is stupid high. Yuck!


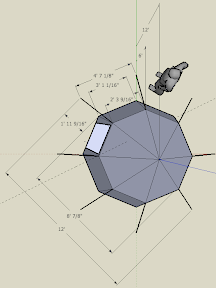
After a wile though, I discovered that spoke tents just look batter and can have a much smaller footprint. So I came up with this design. Which is what I will be using.


After a lot of searching I finally found a pavilion tent I like the looks of. Not rally the "looks", but how it is constructed and works.So I will be trying to follow this sites instructions mostly. Max & Mickel's Easy, No-bake Pavilion.
http://www.sacoriver.net/~freegate/Pavilion.html


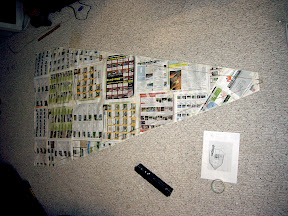
Next using the dimensions and instructions from the side above I made this template for the roof peaces. I used the dimensions from my sketchup diagram, and added 1/5" to all edges, which seems like an awful lot, but I guess I will find out why I need it. I also added 1ft to the bottom of the panel.

Ok, so that is all I have for now. I am soooooooooo exited! Woohooo pavilion tents!

Monday, August 25, 2008

Designing a collapsible cot like bed help

0 comments
Things get crazy around here as the summer draws to a close, and it can be hard to post on time! At least I am still posting on the right day...


On friday I posed about an idea I had for a bed: My chair and a Bed. When explaining it to my dad he said "Oh, you invented a cot! We used sleep on those all the time when I was a kid!" So I did a google search of cots, and yes, that is basically what I dreamed up! Only, I couldn't find one that worked like this. At all. Cool.

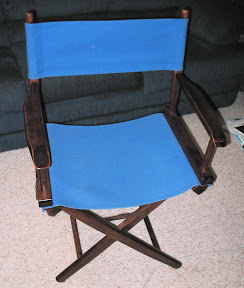
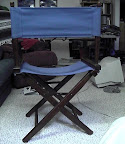
Lets start of with a look at my chair. Click on the picts for enlarged versions)
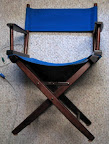

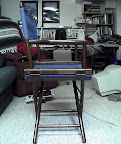
It is a simple chair I got as a gift from some of my film students. A directors chair, or beach chair. What is unique about it is how it holds together.

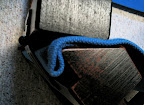
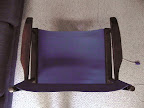
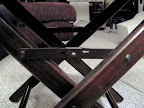
The seat is canvas, and is pinched between two peaces of wood on each side. 
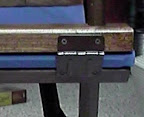

The two peaces of wood are hinged.

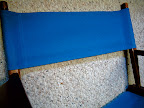
The "pinch" is kept tight by the back of the chair. Another pace of removable fabric.

The idea being that you could change the colors of the canvas, or take it off to wash it. It also allows the chair to become quite compact.

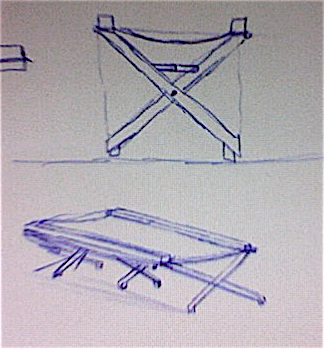
So my idea is simple. Why not extend the chair? Maybe widen it a bit to give a bigger sleeping space.


I drew it out on paper:

But then I got thinking, the frame will be fairly long even wile compact and might not fit in a car. Why not make it two paces, wile still only having one peace of canvas, and why not make the legs detachable as well?

After that I used Google Sketch up to make a mockup 3D design (google sketch up is a free 3d program get it here: http://sketchup.google.com/ ).
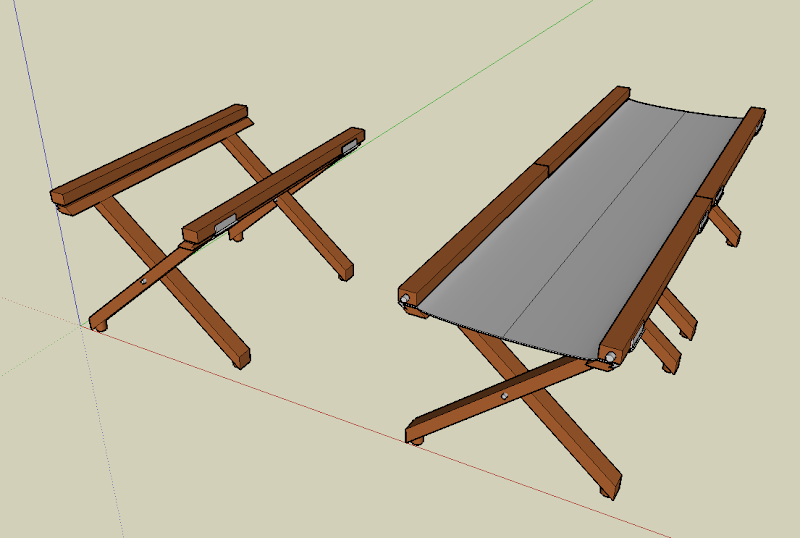

Over the week end I have already found a flaw, I am quite sure I will need to put on bed ends (a head board and a foot board) basically like the back of the chair, to keep the canvass pined down.


I wont be making this to soon, but it is now defiantly on my list of to make stuff! If you have any ideas on making it better or more efficient, or see any flaws in the design let me know!

I will try and get a tutorial up for Wednesday.

Friday, August 22, 2008

My chair and a Bed

0 comments
Well I don't have enough time to wright of a fill post like I planned on this morning, bet let me at least give you something for the weekend.

This morning I woke from a dream. It was about how to make bed. See, I want to make a pavilion tent at some point, and, I think it would be lame to say here is my pavilion tent and it is full of modern looking ugliness. Follow me? Well, one of the things I would to have to go in this pavilion tent, I will one day make, is a bed. However, I, unlike the knights of old, am concerned with space. No, not the space in the tent, but the space it takes to get things places, the space in my car! So, I cant just up and take any bed with me, and I don't want to be using an air mattress on one of those air mattress beds. So what to do?

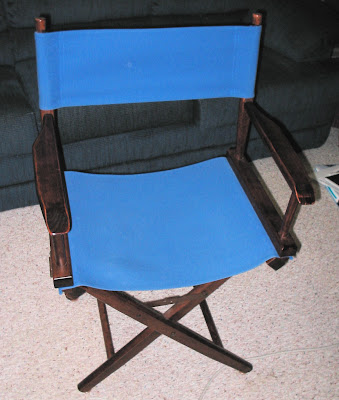
I have been raking my brain for the last year on how to make a efficient, easy to set up, durable, transportable bed. Well I think I have the answer finally! And it has to do with this chair:


I will now leave you hanging until next week. Start guessing! (AKA: make posts you silly people!)

Tuesday, August 19, 2008

How Accessories can make bad garb good.

0 comments
"How Accessories can make bad garb good" might be a bit deceiving title for this post. Really, "How Accessories can make decent garb look good and bad garb look decent"might be a better tile, but is far to long. In this post I am going to talk about about accessories.

For the purpose of this article we are going steer away from expensive Accessories like armor (which can be can be very Useful, make you more Versatile on the field, and be Attractive) and focus on simple little things that can help transform your garb from second rate, to... much better, maybe even spectacular!

Accessories: a thing that can be added to something else in order to make it more useful, versatile, or attractive.

Why use accessories? Well first of they are easy and cheep. But other than that accessories...
  • ...tell a story about you, giving your garb depth
  • ...are fine details that add richness to otherwise mundane garb
  • ...add functionality to your garb

The first thing to consider when looking for accessories is functionality or Usefulness. For example, I don't have any pockets in my garb pants. I soon realized that I had no where to put my wallet or keys, so the first accessories I acquired were 2 pouches to put on my belt, one for my wallet and one for my keys.

Useful accessories might be:
  • Pouch,  to hold stuff
  • Chinese hat,   keep the sun of
  • Gloves,  if you punch block allot
  • Satchle (also known as a man purse),   for holding even more stuff
  • Water boatel sling,  so you can stay hydrated all the time
  • etc.

Second we look for what might make us more Versatile. Here we look for things that might make us more versatile on the field. Armor would be under this category. But another example is a sword or dagger belt. I fight with spear often, when a shield man gets to close to me, I can't use my spear anymore, a sword is sufull in these situations, and sword belt gives me one.
Versatile accessories might be:
  • Sword belt, to hold an extra sword so you are never without
  • Knee pads to protect your knees
  • sun glasses to help you see, disguised naturally
  • Wrist binding if you sword keeps getting cot in your sleeves
  • etc.

After that we want to look for accessories that are Attractive. Now, attractive doesn't have to mean pretty, but rather that it adds to your "look". At this point we are looking for things that fit you, or your persona. Trinkets, and things that don't necessarily serve any other purpose but for show. Fantasy and historical trapping fit here.

Attractive accessories might be:
  • Necklace,  stay away from plastic, metal links, wooden and glass beads "work" best
  • Wrist-lit,  or just something around your wrist, for example a peace of leather
  • Sash,  you don't have to be a scot to wear on of these. There are many ways to wear a sash and not look skittish at all
  • Bandana,  on your head, your arm, tucked in your belt
  • Cloth ankle binding,  get those baggy pants under control, or just on bear skin, one leg or two!
  • Extra belts,  always look cool, don't limit them just to your waist!
  • Rope,   is it a belt, a wrist binding, or a sash?
  • Trinkets,   medallion, lucky rabbits feet, a little whistle, you name it it works.
  • Neck scarf,  keep the sun of or the cold out!
  • etc.

When you make your garb, don't just stop at some trousers and a tunic or tabard, add some accessories and make it truly your own!


Extra Reading:

Beyond the article:
You might try looking at costumes from movies you enjoyed, or do  search on google to get ideas. When you find something you like, take a look, what kind of accessories do you see?

Wednesday, June 11, 2008

Oriental Fantasy Garb, stage 1: Concept

0 comments
These next few half dozen posts or so are being transferred from a forum I posted them on.

So I am making garb, went to a grate fabric place, and got way more martial that I needed (I realized this after a left the store) for around $20. Here is the sketch of what I hope to make over the next week.


And here are the individual peaces.


I will try and get pictures up to show yall how it works out when I am done.