
noun
a small round hole in leather or cloth for threading a lace, string, or rope through.
• a metal ring used to reinforce such a hole.
I thought eyelets would be hard to do, I mean they look cool, and they are professional for heavens sakes! Im my books that means HARD! or not... Eyelets were amazing amazingly easy I pechesed a pack of 12 "large" eyelets with a eyelet anvil and a presser-thing you hammer in a little package for only $4! now that I have the hammer thing and the anvil I can get a package of only eyelets (with lots more than 12 in the package) for $2-4! That meant they are not even that pricey! Cool!
 |
| From Belegarth Mak... |
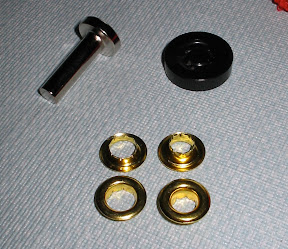
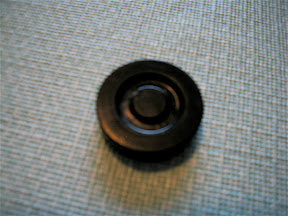
First, you notice that there are two parts to an eyelet, one with the larger top and smaller inside diameter is the front. it is kinda hard to tell in the image above, but... ya, you will be able to figure it out, its not that hard.
 |
| From Belegarth Mak... |
Next poke a hole in the mile of where the net you made was. Then take your sizers and cut little slits about 1/8" out from the hole in all directions. About 6 should be good.

Take your sizers and pike through the hole you made a bit twisting, the nose should be able to stick through ha little bit.)
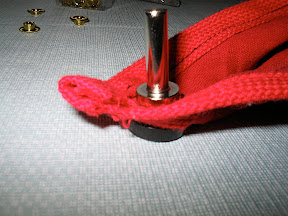
Hammering thingy (top left), Anvil (top right), mail or outside par of eyelet (right two), femail or underside of eyelet (left two).

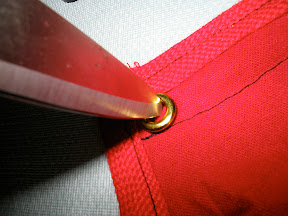
Next push the mail eyelet through the hole you made.
I can se through the hole! Make sure it is the right side out!

Next place the female side over the male side.
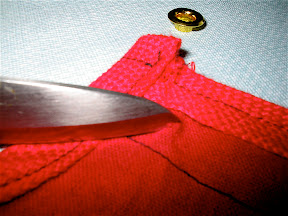
Take you anvil...
Place the male side on the anvil and the Hammering thingy on the female side.
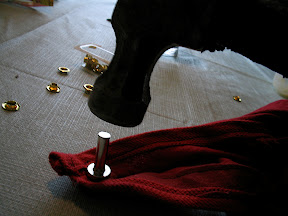
Hammer the the Hammering Thingy with you hammer.

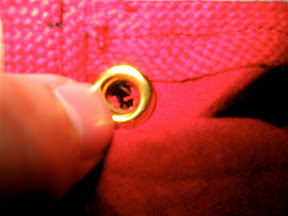
Vala! An eyelet!
Note: I nthe picture above you can see how I have doubled up the fabric where I put the eyelets, I would suggest you do the same.

The final product of our hard work!

You can see how something so easy and simple makes an otherwise dull and boring tunic much more interesting to look at.
3 comments:
Hi there. Nice blog. You have shared useful information. Keep up the good work! This blog is really interesting and gives good details. Garment Buttons Manufacturers, Eyelets.
Lovely facts and figures. I will continue visiting this blog regularly
I'm inspired by your clear instructions, I think eyelet making is something I want to try.
Post a Comment