
Disclaimer: I learned this technique from a post on another blog, I would recommend you also view that post to gain a better understanding of this process. Medieval Craftsmen: Viking helm: part VI
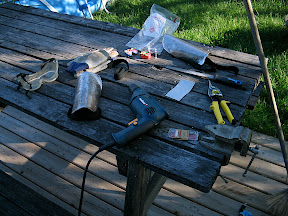
Ok here is the stuff you will need (in no particular order):
..oh, and a hammer...
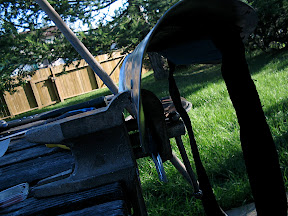
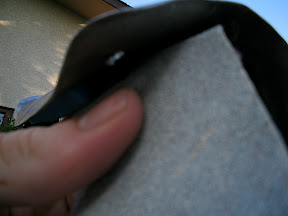
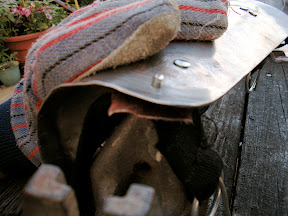
Ok first clamp whatever you are riveting down, for me this is a pair of bracers. You can see I a=have a C clamp (think that is what it is called), it also serves as a kind of mini anvil for me.
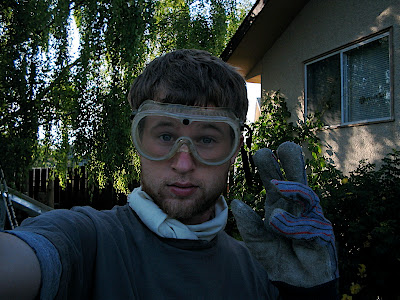
I made this picture big, so you would not miss it! Put on the goggles and gloves! There will be little specks of steel flying through the air (think if small shrapnel), and it is really easy to slice your finger open if you are lazy, and getting a peace of steel in the eye sucks in ways you (and I) don't want to even imagine, besides you want to actually see the finished product right? DONT TAKE STUPID RISKS! The time and $5 it takes to go and buy some safety gear is not a good excuse!

Ok, so basically, you put one of the bits in the drill, plug the thing in, and start drilling, you don't even have to push to hard!
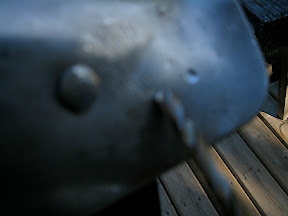
Part way...
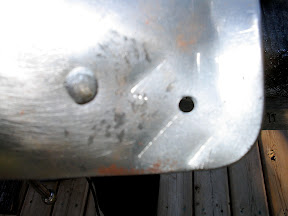
See, here is the hole, simple. It took about 30-90 seconds!
So, you cant really see it in the pictures, but the drilling left some pretty rough edges, so, be careful not to cut yourself, and sand off the rough bits (this is where you can use the file if you so please).
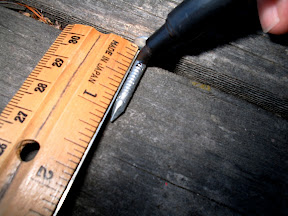
Next take one of your roofing nails and mark it at about 1/4"

If you have taken of the safety rear... PUT IT BACK ON! they next step involves larger bits of steel potential flying through the air.
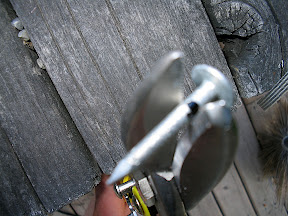
Then take your Aviation Snips (or heavy-duty Tin Snips), and cut the ting in two. I will some times place the cutters and nail under an extra glove or peace of cloth to prevent the nail ends from flying in to the air. THis step will take some effort, of you get stuck, turn the nail 90° and cut along the same line.
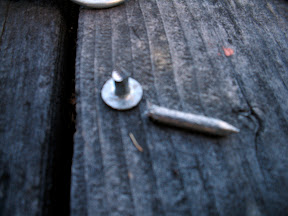
And here it is cut! You may need to file the tip a bit if it is excessively jagged.
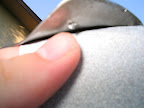
Next take the end of the nail with the head on it (the rivet), and whatever it is you are riveting, in my case some straps to my bracer, push the new rivet up through the hole you just drilled. I like to put the nail head on the bottom side of what I am riveting, but it doesn't really matter.
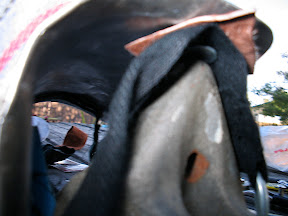
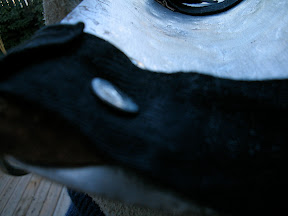
Here is a view up from underneath. The idea is that the head of the nail is siting on something solid. Make sense?
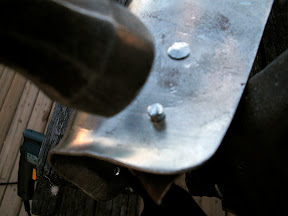
Now, hemmer it flat! Simple! Like a game of bop the gofer, except it doesn't move, and is easier!
Almost done!
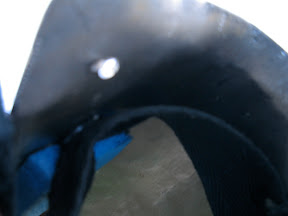
Ok... so this photo didn't turn out so well... so your just going to have to trust me on this one. Sometimes with all that pounding down, you need to pound it back up thought the hole. So it might look like your done, but you turn it over to find your not quite.
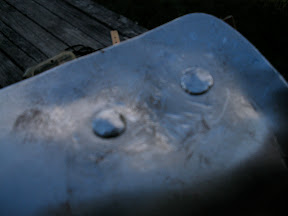
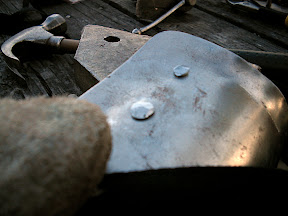
Ok and here are two finished rivets from the top...
And the bottom!
I will be making myself a simple suit of armor in the coming months, at which time I may redo this tutorial in video for more clarity. Alright class any questions?
Ok here is the stuff you will need (in no particular order):
1. Safety goggles
2. Something to rivet
3. A Power Drill
4. Work Gloves
5. Sand paper
6. (optional) File
7. Clamp
8. Something steel (or hard, like a rock?) to pound on.
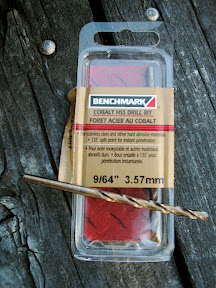
9. Cobalt drill bits
10. Roofing nails (the ones with big heads)
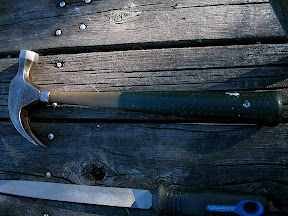
..oh, and a hammer...
Ok, so this important. You need a drill bit that can drill through steel. You will find them with all the other bits in your local hardware store. If you are unsure, it should say that they are good for stainless steel. Bout $5-10. I got 9/64" bits, it is important that they are about the same size as your roofing nails, (error toward a bit bigger if you have to) I just eyed them wile hold them up to a roofing nail I was buying.
Ok first clamp whatever you are riveting down, for me this is a pair of bracers. You can see I a=have a C clamp (think that is what it is called), it also serves as a kind of mini anvil for me.
I made this picture big, so you would not miss it! Put on the goggles and gloves! There will be little specks of steel flying through the air (think if small shrapnel), and it is really easy to slice your finger open if you are lazy, and getting a peace of steel in the eye sucks in ways you (and I) don't want to even imagine, besides you want to actually see the finished product right? DONT TAKE STUPID RISKS! The time and $5 it takes to go and buy some safety gear is not a good excuse!
Ok, so basically, you put one of the bits in the drill, plug the thing in, and start drilling, you don't even have to push to hard!
Part way...
See, here is the hole, simple. It took about 30-90 seconds!
So, you cant really see it in the pictures, but the drilling left some pretty rough edges, so, be careful not to cut yourself, and sand off the rough bits (this is where you can use the file if you so please).
Next take one of your roofing nails and mark it at about 1/4"
If you have taken of the safety rear... PUT IT BACK ON! they next step involves larger bits of steel potential flying through the air.
Then take your Aviation Snips (or heavy-duty Tin Snips), and cut the ting in two. I will some times place the cutters and nail under an extra glove or peace of cloth to prevent the nail ends from flying in to the air. THis step will take some effort, of you get stuck, turn the nail 90° and cut along the same line.
And here it is cut! You may need to file the tip a bit if it is excessively jagged.
Next take the end of the nail with the head on it (the rivet), and whatever it is you are riveting, in my case some straps to my bracer, push the new rivet up through the hole you just drilled. I like to put the nail head on the bottom side of what I am riveting, but it doesn't really matter.
Here is a view up from underneath. The idea is that the head of the nail is siting on something solid. Make sense?
Now, hemmer it flat! Simple! Like a game of bop the gofer, except it doesn't move, and is easier!
Almost done!
Ok... so this photo didn't turn out so well... so your just going to have to trust me on this one. Sometimes with all that pounding down, you need to pound it back up thought the hole. So it might look like your done, but you turn it over to find your not quite.
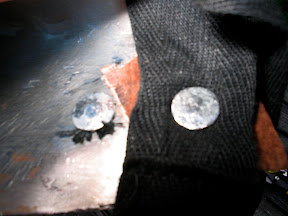
Ok and here are two finished rivets from the top...
And the bottom!
I will be making myself a simple suit of armor in the coming months, at which time I may redo this tutorial in video for more clarity. Alright class any questions?
3 comments:
Glad my post helped.
Me to! :)
Hi! Thank you for sharing your thoughts about roofing in your area. I am glad to stop by your site and know more about roofing. Keep it up! This is a good read. I will be looking forward to visit your page again and for your other posts as well.
In areas where clay is plentiful, roofs of baked tiles have been the major form of roof. The casting and firing of roof tiles is an industry that is often associated with brickworks. While the shape and colour of tiles was once regionally distinctive, now tiles of many shapes and colours are produced commercially, to suit the taste and pocketbook of the purchaser.
Still have questions? We are ready to answer them! Please complete our online Estimate Form to the right, or visit our Contact Page. When roofing your Tewksbury, MA home, choose quality roofing materials and roofing products from Budget Exteriors.
Roofing Tewksbury MA
Post a Comment