Showing posts with label Sewing. Show all posts

Thursday, June 9, 2011

Popular series from the past: Rag Rug Garb

2 comments
     To get myself going I am going to post a series of articles linking to my most popular tutorial collections. The first is about my "famous" Rag Rug garb. Rag rugs are very versatile, cheep, and easy to work with. The possibilities of how to put them together are endless, I have come up with 2 methods that work well.

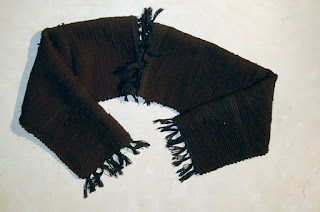
     Rag rugs garb, some people love it, some hate it. I call them "poor man's gambesons". Though they don't offer any real physical protection like a proper gambeson they do offer a fighter many of a gambeson's other benefits. They offer a good bit of padding to hard blows that takes the sting off if you have sensitive skin, they offer great padding for chain mail and other armours making them more comfortable to wear and get hit in, they breath very well in hot weather because of the large loos weave, and also provide insulation and warmth in cold weather.
      Rag rug garb can be very simple to make, it can take less than 2 minutes to put together a simple tabard/vest and perhaps an hour to but together a full coat. I find my rag rugs at a dollar store (dollarama) for $1-$2 a peace, making the cost range from $2-$8 for a peace of garb.

A rag rug coat.
A spear man in a rag rug tabard.


Thursday, June 24, 2010

Afghani Dress

1 comments
This is the second Afgani dress I have made now. The other being last week, and unfortunately I didn't take any picts of it, this this dress is quite a bit smaller and uses less fabric if you can believe that. What? Why would I be making an Afgani dress? Good question! I don't intend to ware them ether.

For the last 7 years my family and I have taken part in the largest stage production in western Canada. The Canadian Badlands Passion play has a cast of about 150, many with multiple costumes. That is a lot of costumes. This year something different happened, rather than use only the 200 some costumes from previous years the art department said we could really enhance this if we had better costumes. So they ordered a LOT of fabric and began sewing, and I am helping in the process (as making 100 some new costumes from scratch is a very big task). 

Friday, February 26, 2010

Yet Another Hat

0 comments
Well, I haven't quite got it figured out... This one is the right size up top I think, but a bit short, and the bill is crooked... Not sure why. Definitely the best so far...


Tuesday, February 23, 2010

Cuff Armor Prototype

0 comments

I found a intractable for fingerless gloves the other day. I really like fingerless gloves, I have pare of light leather ones I fight with all the time and love, they offer some protection against burns, still allow good grip and are stylish. But I would like to have bit more coverage and maybe some thicker protection on top. So I am thinking of using parts of this pattern to make a armored glove (Nija Brig stile). This is my first prototype, I like the feel and look of it so far.

I will probably have 3 or 4 leather plates sewn in to pockets, I might think about some thumb protection, and might add a velcro (or some other kind) fastener at the wrist.

Monday, January 25, 2010

Rag Rug Coat Tutorial: prt 2 - Torso

2 comments


This is poart two of my tutorial on making a Rag Rug Coat. See party one here: Rag Rug Coat Tutorial prt 1 - Sleeves

The torso peace is the most complicated of the 3 rag rug peaces. It differs from the vest in quite a few ways. First it is not open on any of the sides but ties up in the front giving more protection and isolation. Second, it is open on the top on the shoulders and doesn't work well by itself, but works best with sleeves.


0. Once again we start with two rag rugs, additionally you will need some strips of cloth.


1. Cut a strip of cloth about 2/3 the length of rugs and sew it on the rug as shown. The red dots show where to sew. I did one additional seam for each side than shown above, for strength. I call this peace the spine.


2. Next on each side fold over a pace of cloth the same size as the spine on each side. Unlike the image above fold it over so that there is cloth on both sides.


3. You can see it better here, as well you will see I have added 4 ties to each side. You don't have to use ties, you could use, loops and then lace it up, buttons, zippers or togals.


4. Next you add the shoulder straps to the spine as shown. Don't be afraid to sew zealously here (once yo are sure you have it in the right spot of corse) as this join will take a lot of stress.


5. Next attach the shoulder straps front. I used ties in this image so I can adjust the straps some, but other times I just sew strait on to the back side of the front. Make sue you measure to get the length of the straps right, and test them before you re-enforce the seams. Make them a bit tighter than you think necessary as rag rug will stretch a bit.


6. And here is what it should look like. A belt makes it look nicer.

Tuesday, January 19, 2010

Rag Rug Coat Tutorial: prt 1 - Sleeves

3 comments


This is part one of how to make a Rag Rug Coat Tutorial. A rag rug coat is a 2 pace garment consisting of a front tying torso peace and a sleeve peace. In this tutorial I will cover how to make the sleeve peace. The sleeves are the simplest part of the coat, and as you can see above if you wish can be warn with a rag rug vest, or even by-themselves.
Rag rug garments are warm and breathable, the coat is no exception and is better for cold weather where than the Rag Rug Vest. Rug garments also provide a good bit of padding, so work well as a poor mans Gambian ether to simply pad blows or to pad under armor.


1. You will need 2 Rag/Bradded Rugs, one for each sleeve. Fold each in half shot ways.


2. Sew along the doted line. You may be able to sew a bit further toward the torso or may need to leave a bit more room depending on build.


3. The double layered rug is very thick, you may want to loosen the pressure of your foot on your sewing machine to get over it better. I did a straight line seam and then a zig zag over that for strength.


4. Next place the 2 completed togather as shown. You want to make a bit of V shape. The angel of the V should by stronger in the back then on the front seam (or the back will bulge a bit). I recommend only doing on seam on each at first as you may want to adjust. The Back seam should also be a bit longer than the front.


After you are sure you have the angel right sew it good at a lot of pull pressure is on these seams. If you can also try to sew over multiple stands of cloth for strength or the rug may begin to separate over time.


That is it. If you have any question, post a comment I would be more than happy to try and clarify anything.


Related Posts:

Monday, January 11, 2010

Rag Rug Vest/Tabard Tutorial

0 comments

Finally a tutorial on Rag/Bradded Rug fashions!


You will need 2 Bradded Rugs for this project.

Here is what a the Bradded Rug looks like. As you can tell it is quite thick and has a nice texture.


1. Placing the rugs back to back you will sew along the doted lines. Be sure to leave enough room for your head. The lines shown here are a little tight for me, I would not make them any closer togather.


2. The double layered rug is very thick, you may want to loosen the pressure of your foot on your sewing machine to get over it better. I did a state line seam and then a zig zag over that.


3. You will end up with something like this. This side is the inside of the vest. If you want you can call this done here.


4. However, I added one more seam. On the front of the neck I folded the edge over and inside and sewed it flat.


5. And here is the finished product.

Related posts:
More Rag Rug GarbRag Rug Coat

Monday, January 4, 2010

Another Hat

0 comments
And we are back from the holidays! I got depressingly little crafting and making done over the last 2 weeks. But I did get to something last night, I took another go at a hat. This time bit more complicated.

1. I used one of my favorite hats as visual pattern. Looking at it and doing aproximate measurements of all the peaces. (I used an appropriately sized plate for the top pattern)

2. I used leather from a old leather jacket I got from a thrift store. And traced my paper patterns on with a sharpie pen I got for christmas.

3. I used the had once again to look at how the thing was sewn togather and mimicked it as best I could. It turned out pretty good. But unfortunately, it is a fair bit to big. Next time I will need to take off about 1/4" around all the peaces I am thinking.


Saturday, November 7, 2009

Pro Foam Fighter: Foam Tech - Mog's Cover Design

0 comments

Ok, I made this up the other day, depending how things go I might make some more and turn it in to a series of sorts. As far as I know the sword cover method shown in this video is original, I have never seen it on another weapon before. I really like it, and hope to cover my future weapons in this manor as the benefits are so large.

If you want to know how to install grommets or eyelets see my tutorial: Eyelets Are Easy

Monday, August 31, 2009

More Rag Rug Garb

0 comments
I am wondering about selling them online, what price would you expect to see somthing like this for?


The plain color rugs have been out of stalk for a wile so I got some more scrap rugs to try some other things:

A Rag Rug Tabard/Vest:

I have been wearing this one under my chain mail, and man does it make good padding! I can hardly feel the chain anymore when hit hard, where as before a hard strike to the edge would put me on the sidelines for a short bit (Oriental 4 in 1 half vest).

And I have made a sort of poncho that can go with it (or the base peace of the coat), didn't turn out quite as I had hoped so I am going to get some more at some point and try again. I have yet to need to wear it (our warm weatherjust decided to hit-ish).


Thursday, July 23, 2009

Rag Rug Coat

0 comments
Here is jacket I made out of 4 Rag Rugs from Dollarama. I have a few other designs I plan to try some other designs as well, if things go well I might try and sell some.

From Stuff Maker Blog

From Stuff Maker Blog

Tuesday, July 21, 2009

Pavilion Tent Test

0 comments
I had my tent up for 3 full days this last weekend with its new modifications, it held up very well, it never got that windy, but it was reassuring to see that it did not blow down!


This is the new setting up system I made, I can now set up and take down the tent myself in about 15 min without any help or trouble, except on the windiest days.


Still need a few modifications yet, but it is getting there.