Showing posts with label Tents. Show all posts

Monday, August 8, 2011

Weapons Rack

1 comments
You can see me on the left in my armour (Photo by Savage)
I was privileged to attend my first ever american Belegarth event a few weeks ago, Chaos Wars in Hailley Idao. I was able to set up my pavilion tent in our Canadian Camp and we used it as our gear tent, one half housed all our food, coolers, dishes and other eating supplies, and the other side housed fighting gear such as weapons, armour and repair materials.


However, the inside of the tent began to fill up with all our gear, it formed a large pile so that we couldn't really get at the weapons we wanted and the weapons a the bottom were getting squished. Whats more the pile began to encroach on the food side of the tent so we couldn't get at out food ether.


The solution to this was to build and arming rack out of stick from the woods. we used as much rope as we could find and then some duct tape when that ran out. Our passing weapons would be leaned on the rack wile the failing weapons that needed repair would be placed in the tent so on one would accidentally use them.

Camp "Canaidia"
You can see we added a few modifications as the week went on to better accommodate different weapon sizes and add structural integrity. When we packed up we just cut the tape of and through the sticks back in to the woods!

Wednesday, June 15, 2011

Popular series from the past: Medieval Pavilion Tent

1 comments

What could be better than going to an event than going in a traditional medieval tent? I have always loved Pavilion tents and a few years ago I was privileged to make one for less than $100! This collection of photo tutorials takes you from start to finish on how to make a medieval pavilion tent. If you want to see more photos of the finished tent, you can find them here: Pavilion Tent (click the read more link for list of tutorials)


Tuesday, July 21, 2009

Pavilion Tent Test

0 comments
I had my tent up for 3 full days this last weekend with its new modifications, it held up very well, it never got that windy, but it was reassuring to see that it did not blow down!


This is the new setting up system I made, I can now set up and take down the tent myself in about 15 min without any help or trouble, except on the windiest days.


Still need a few modifications yet, but it is getting there.

Monday, September 29, 2008

Small Pavilion Tent: Step 6 - The Center Pole

1 comments
This tut has been unusually difficult to put together, and as such it is likely I missed some things and possibly am not as clear as I could be at times, so pleas feel free to ask for clarification if needed!

With a single pole pavilion tent, it just follows that the center pole is the most important part of the structure, it really holds the hole thing together. Mine is made to split in to 2 parts, and is really, rather simple.

Supplies:
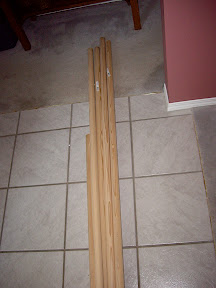
I started with a 10' 1.5" hard wood pole. 10' because I designed my tent to be 10' high.
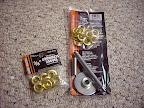
I bought a thing called a ________. I found it in the plumbing section of Home Depot.
I also found a dowel in my basement.

Tools:
Wood/Carpenters Glue
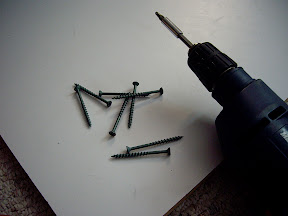
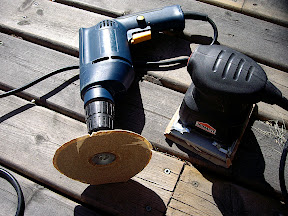
Power Drill
Drill Bit the size of the dowel
Sander
Saw


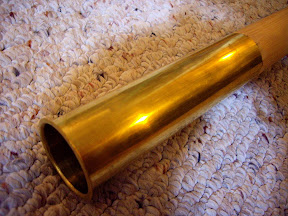
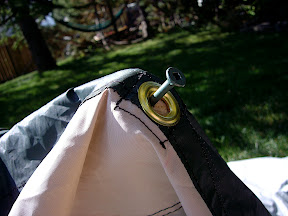
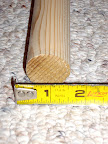
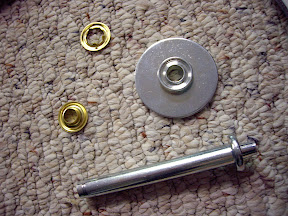
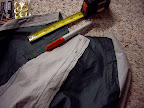
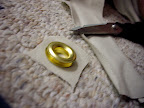
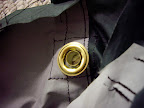
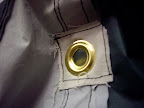
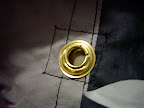
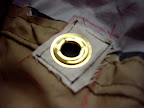
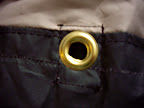
The ____ is the key to the center pole. Here is what it looks like, I could have got a longer one, but would not wont to get one much smaller. It is really just a copper tube with a lip.


Pay careful attention, this sounds a bit complicated but really isn't. The hub will sit on top of the "lip" of the ______ (The coper pipe). The outer diameter of the _____ is exatly 1.5", same and as the center pole, meaning the inner diameter is a wee bit smaller. This is good, this means that it cant just slide down the pole, I have to do a bit of sanding to get it to slide on.


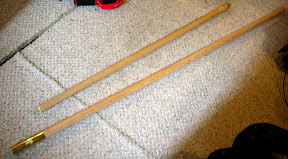
I want the pole to split in to two peaces for transport, so I want to cut the pole in two.
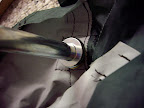
I want the hub and spokes to sit 6' above the ground, however I want the bottom part of the pole to only slide half way up the ______ (the coper pipe).

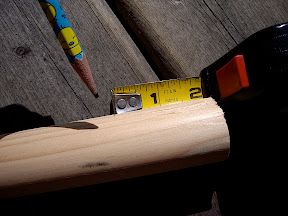
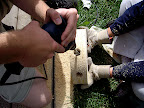
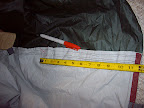
So I sanded and end of my pole down to it would fit about half way in to the tube, when I had the tube on as far as it would go I measured 6' from the tube lip down the pole to find out where I would cut! Simple!

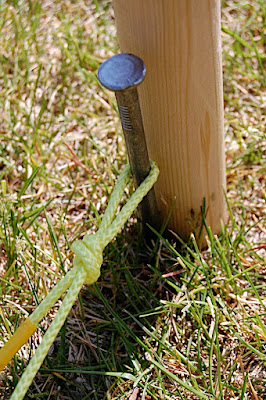
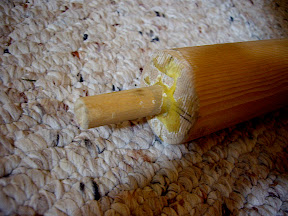
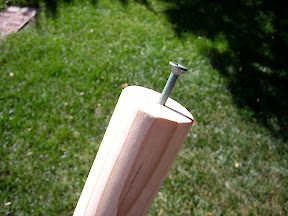
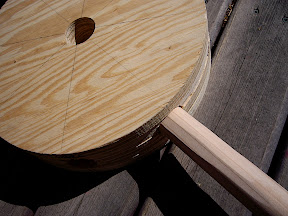
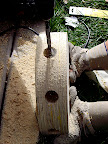
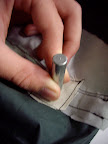
In order to keep the roof on, the top of the center pole needs a little peg. I used a dowel I found in my basement cut it at about 4" and then drilled a hole about the same diameter about 2 1/2" deep. I used wood glue to make it stay put.

And that is it! Naturally I sanded all the rough ends to make them smooth and not so splintery.

Friday, September 19, 2008

Small Pavilion Tent: Letter from Max

0 comments
I sent Max an e-mail thanking him for their Max & Mickel's Easy, No-bake Pavilion article, here is the response I got.

Hello Dallas,

Your first camping trip with the new tent was certainly more exciting than most! I'm not sure if my tent has ever seen that kind of wind.

In a 1" flat felled seam each panel goes past the center of the seam by half an inch, and then folds back a full inch from there. That's 1.5" of allowance for a 1" seam. Perhaps the rolled seams you used were different?

Thank you for posting pictures of your tent! I'm glad that my article was useful to you.

Max


Judging from this I would say that I am using a different flat felled seam than they are, and that is probably the main reason for the loose fit of the tent to the frame. So if you decide to follow these tutorials, ether follow Max's description of a flat felled seam or if you follow mine, only give a 1" seam allowance not 1.5".

Wednesday, September 17, 2008

Small Pavilion Tent: Step 5 -The Spokes

0 comments
Now comes that part where I got so rushed I didn't have time to take picture in action, so I have taken some supplementary pictures hopefully they will fill in the gapes well, if not, pleas ask for clarification.

In this Tut I will be making the spokes, the spokes "plug-in" to the hub, and hold the walls and bottom of the roof out away from the center pole.

From Stuff Maker Blog
Ok, and before we get going, here is my tent diagram, the reason I am bringing this up again is you can easily check back here to see where i am getting my dimensions from.

I purchased four 8' poles, these will be my spokes.

They are each 1 5/16"

Ok, this is a supplementary pic. I measured from the center of the center pole hole, 4' out. 


I used my jig saw to cut it, but really, any saw will do, a hack saw would work great for example.

I have a jar of odd screws I found 8 longer ones...

..then get out my power drill and bit that matches

And put a screw in one end of each of the 8 poles/spokes

The screws each go through one of the 8 Grommets at the bottom/valence of the roof.


The other end of the spoke needs to be sanded down to fit in the spoke holes in the hub. This will take a LONG time by hand so you will likely want to use some kind of automated sander. You can see the cheep vibrating sander on the left, but personally, if you already have a drill, you could get a drill sander attachment which I prefer, it is cheeper and a lot nicer to use.


Here is a sanded spoke fitting in to a hub.

Ok,that is it. I hope that all made sense!

Monday, September 15, 2008

Small Pavilion Tent: Step 4 -Making a Hub

0 comments
Next up, lets look a the hub. The Hub is very important to the structure of the pavilion., and rivals the center pole in importance, as it hold the hole thing together. The walls and roof of the tent are held out by spokes, that are held in place by the hub. Think of a giant wagon weal. The hub rests about 6ft up the center pole, and is what all the spokes are held in place by.

Once again I am extensively using Max & Mickel's Easy, No-bake Pavilion tutorial for my tent. Read it to gain afull understanding of what is going on, and more details I may miss.

Wile Max & Mickel's Easy, No-bake Pavilion suggests against using this method it was the only one I was able to do. I found 4 precut round paces of plywood (or is it chip wood?) at Home Depot for about $5 each, I used carpenters glue (a lot of it to) and glued them together, I was planing on using 3 clamps, but could only find one... So one side is glued better than the other. I was happy with the result, I don't think these will be coming apart... ever. However, I do plan on putting in about 4 bolts (with washers) just to make sure.


Now, the the dowels I am using for spokes are 1 5/16" and the center pole is  1 1/2"


Drill Bits don't come in 1 5/16" sissies however, so I had to settle with 1 1/4" and naturally I got a 1 1/2" bit as well.

Find the middle of the hub (for the center pole) with a math compass (the device on the left), and the angles (for the spokes) with a protractor (the device on the right).

Put on safety gear now! Giant slivers in the eyes is no fun! Also, thicker gloves will help slow the inevitable vibration caused numbing of your hands.

I had to get my mom to hold the Hub wile I drilled, as it wanted to spin.

Drilling the Center pole hole was easy enough, but drilling against the grain of the chip/ply wood is quite a struggle, mess and a work out. My arms were complaining quite a bit afterwards.

I drilled about 2" deep on every hole.

There you have it a hub!

Monday, September 8, 2008

Small Pavilion Tent: Step 3 - Grommets are easy!

0 comments
grommet |ˈgrämit|
noun
1 an eyelet placed in a hole in a sheet or panel to protect or insulate a rope or cable passed through it or to prevent the sheet or panel from being torn.


Next I put in some 3/4" Grommets, this tutorial will be much the same as my earlier Eyelets Are Easy Tutorial.


We need:
  • Hammer
  • Wood Block
  • Reenforcing thick cloth backing
  • Swing machine or thread and needle (optional)
  • Grommets (front and back peaces)
  • Grommet anvil
  • Grommet hammering thing
  • Tent


I purchased a 3/4" Grommeting Kit (with 5 grommets) for about $14 at Home Depot and 4 sets of 10 3/4" Grommets for about $5


From the top hole on the roof I measured and marked 2" on the wight seems and 4" on the green seems.


Now, my tent material might hold, but it might not, I don't want to take the risk, so I am going to back the grommet with some thick durable material to reinforce it and help prevent it from ripping out. See here I have cut a square out a bit bigger than the grommet.


You don't have to sew it on, but I would strongly suggest it, the extra seems with like strengthen the tent.


Now get out that grommiting kit. It looks like a giant eyeleting kit.


THe Grommet kit came with a "punch", which was nice. You need the peace of wood for this bit, you simply hammer a hole for the grommet. However after punching holes for about 15 grommets, it was very dull. Almost unusable. Sizers are your friend.


The hole punched!


Place the front/good/out side of the grommet on the grommet anvil.


Place the hole in your roof on the anvil also so the grommet sticks through. (I put the roof on upside down here)


Place the bottom grommet peace on top of that.


And the hammering thingy on that. Whack the to of the hammering thingy a few times with a hammer.


And you should have this! A nice professional looking grommet!


Here are pict of all 8 of the roof peek grommets in.


Measure the bottom of the roof (the valence) at 12" and mark it.

And add cloth backing and grommets.

Like so.

That concludes this tutorial!